

Windows 10 is no longer the last version of Windows. Microsoft graced us with a new version of Windows, Windows 11, back in November 2021. It is equipped with new features including a new immersive display and memory management to optimize the applications running in the foreground.
If you’re looking to upgrade your current Windows version to Windows 11, or to freshly install Windows 11 on your device, this post is for you.
Microsoft has promised to roll out free upgrade offers to its users with “existing and eligible PCs by mid-2022.” Therefore, if your computer is compatible with all the Windows 11 OS requirements, you can simply wait for the free upgrade offer to eventually update your OS to Windows 11.
However, if you don’t want to wait for your upgrade offer, you can read on to find out how Windows 11 Installation Assistant provides you with the best alternative to get Windows 11 today. We will discuss, in this article, the simplest most-preferred methods to get Windows 11 running in your system.
Here’s the step-by-step guide on how to download and install Windows 11 on your computer right now.
Step One: Preparing Your Computer for Installation
Before you can start the installation process, you’ll want to make sure that your computer can support Windows 11.
Remember to back up all your data to an external hard drive or online storage system so that you will not lose anything if something goes wrong during this process.
To check for Windows 11 compatibility, you can download Microsoft PC Health Check App and run it to allow Windows to verify if your system is compatible with basic Windows 11 device specifications:
- System Firmware: UEFI and Secure Boot enabled
- TPM: Trusted Platform Module 2.0
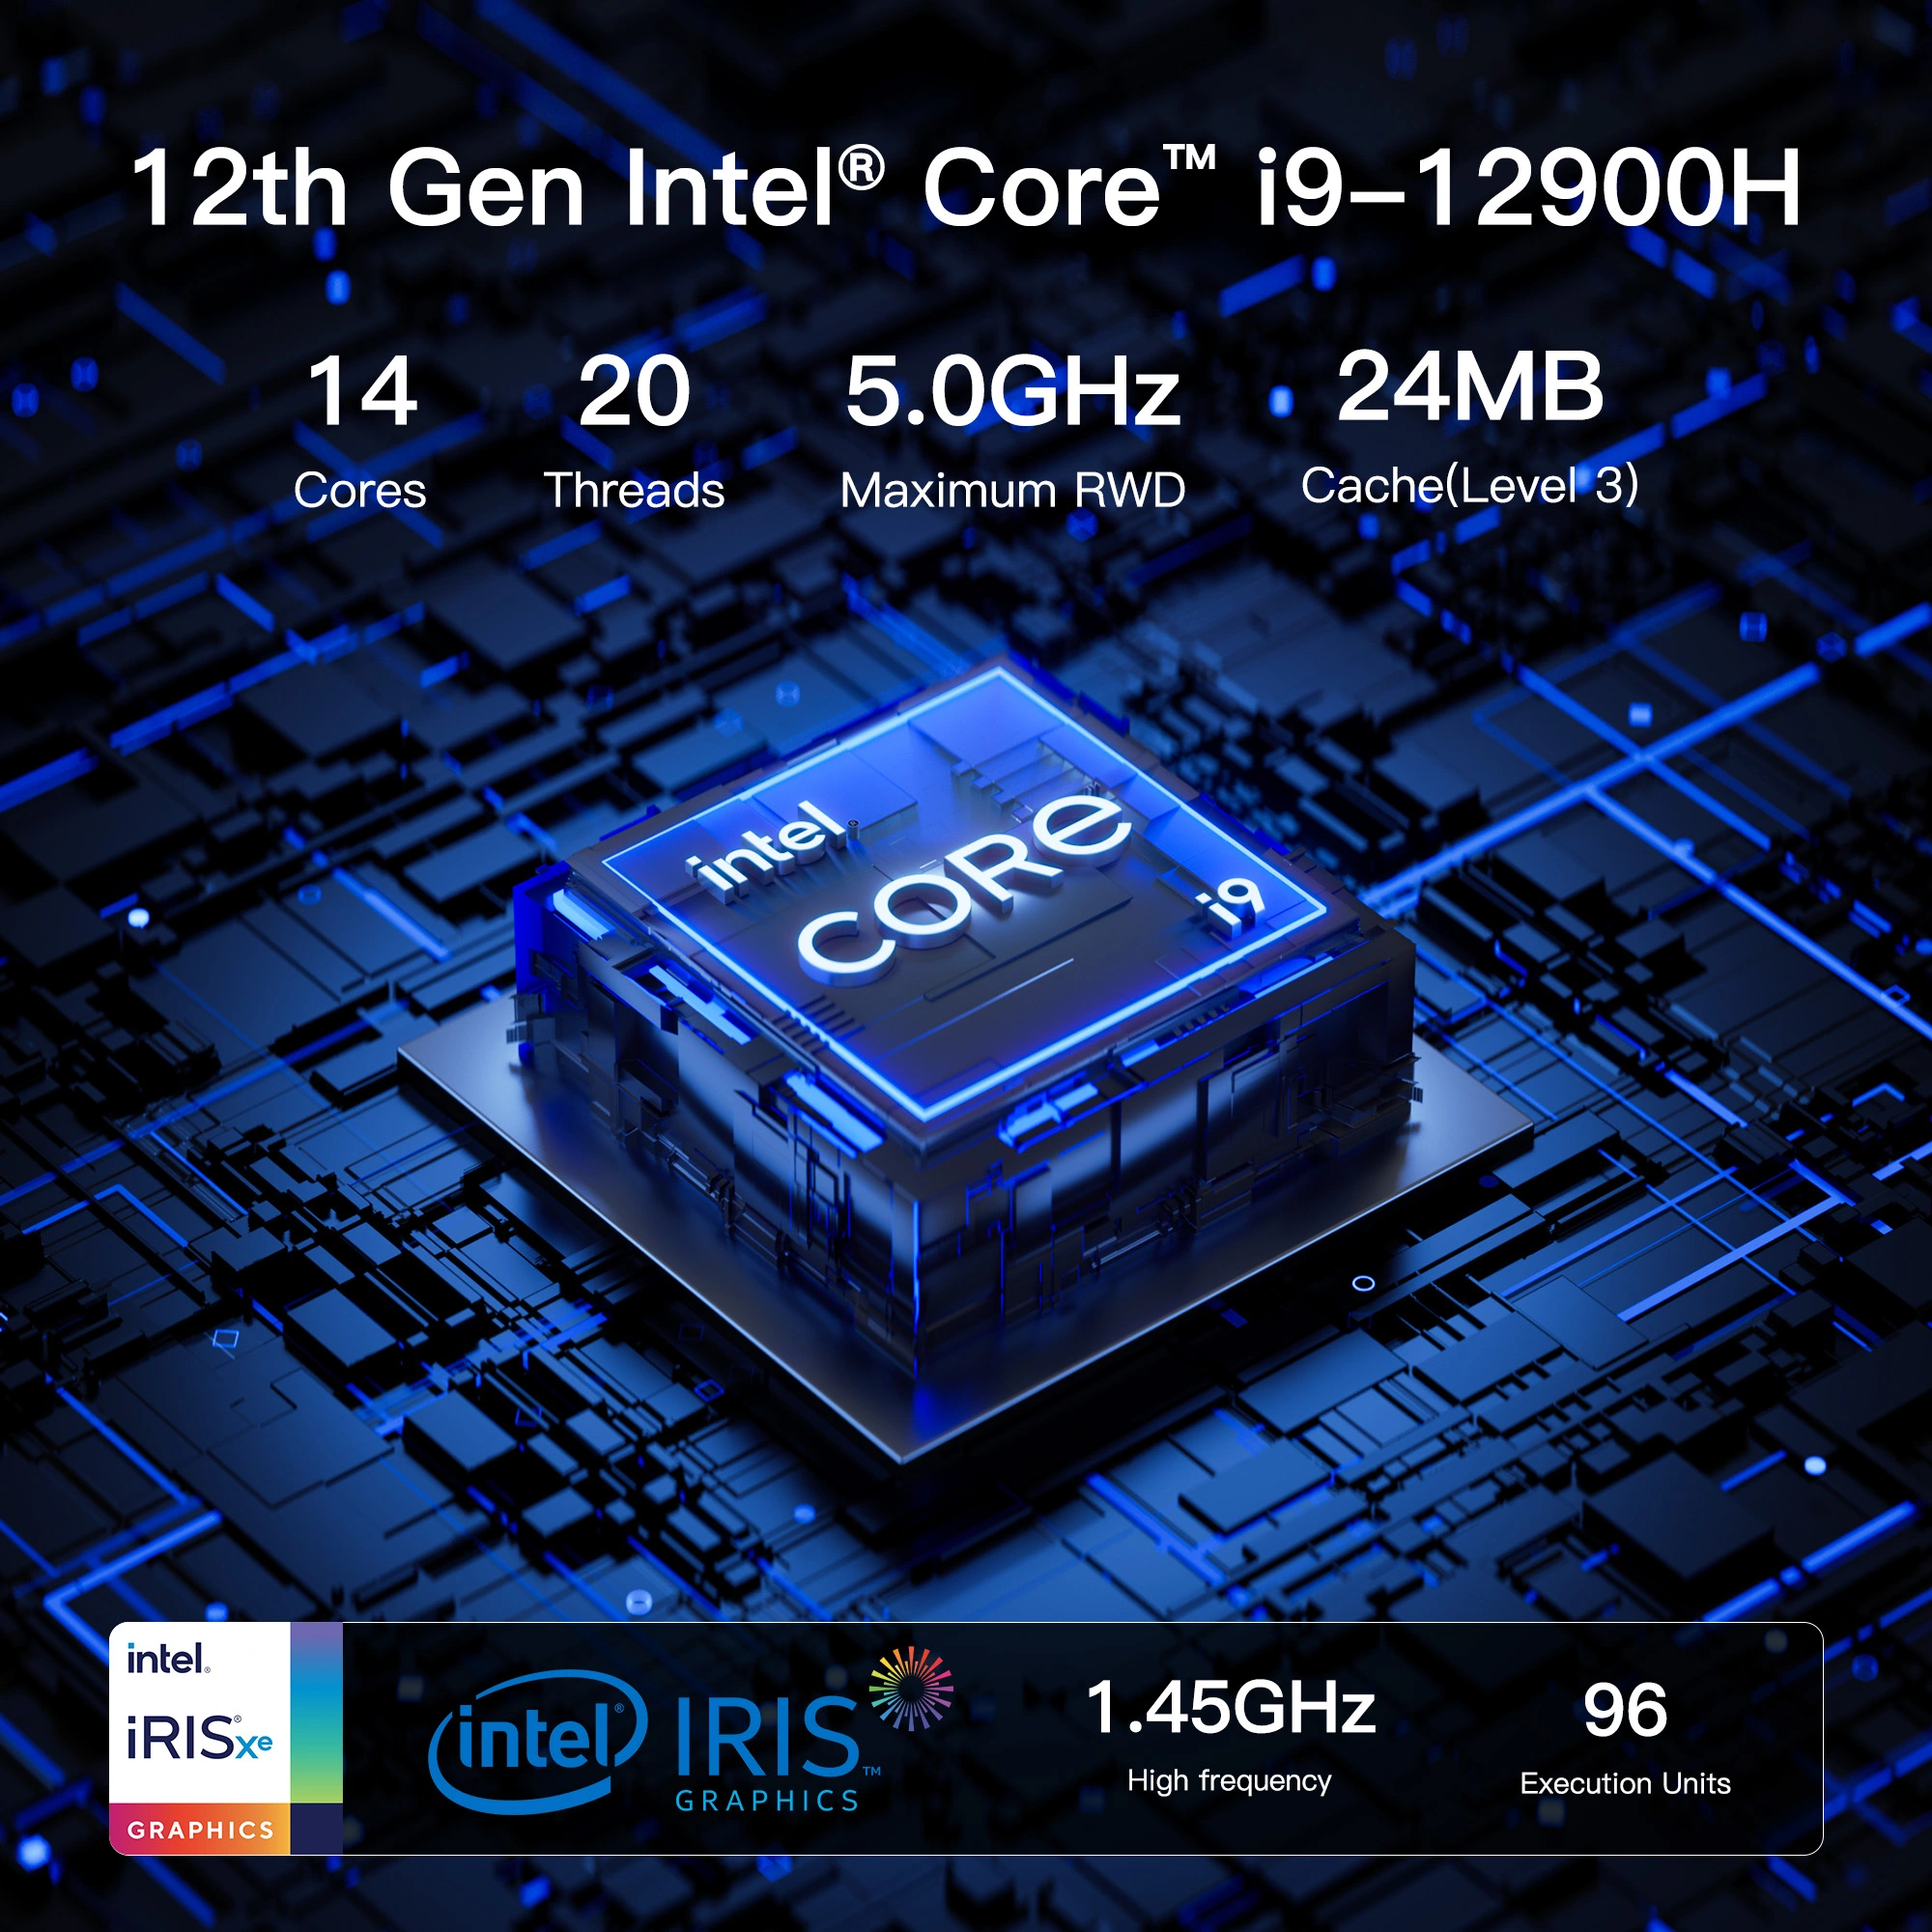
- Processor: 8th-generation Intel CPU or newer
- Graphics Card: Compatible with DirectX 12 or later with the WDDM 2.0 driver
- RAM: 4 GB or more
- Storage: 64 GB or larger storage device
- Display: An HD display of 9″ diagonal or more with at least 720p resolution.
Microsoft made it a compulsory requirement for all computer manufacturers to include TPM 2.0 and Secure Boot in their product motherboards in 2016. These features must be enabled in your UEFI/BIOS setup utility to enable your device to pass the Windows compatibility check. You can learn how to enable TPM 2.0 and Secure Boot here.
Your computer is now ready to install Windows 11. Let’s get started.
Step Two: Upgrading from Windows 10 to Windows 11
This is the easiest method of installing Windows if you score all the compatibility standards. You can check to see if Windows 11 upgrade has been made available for your computer by navigating to the Windows Update Settings page through these simple steps:
- Open Windows Start Menu and search for Settings or press Windows + I key to open the Settings page.
- On the Settings menu, select Update & Security, Windows Update, and then check for updates.
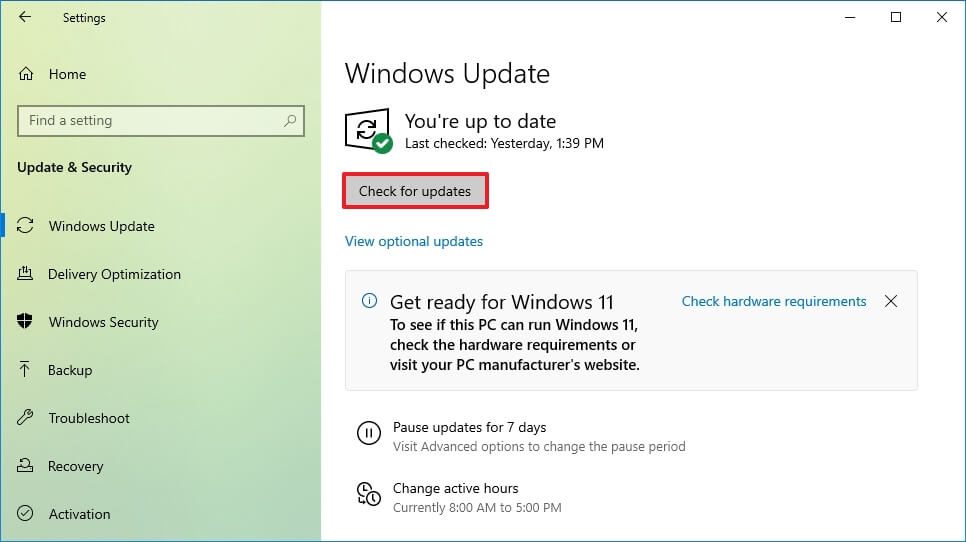
You will get the option to download and install Windows if Microsoft has provided you with the free upgrade offer. Follow the on-screen prompts to install Windows 11. Easy, right? However, if you haven’t received an upgrade offer, proceed to the next section.
Step Three: How to Install Windows 11 Using the Installation Assistant
To update your system to Windows 11, visit Microsoft Windows 11 download webpage and click the Download now button under Windows 11 Installation assistant to download the file and launch it to start the installation process.

PC installer will automatically download, verify the downloaded file, and finally install Windows 11 without you breaking any sweat. The installation process may take less than an hour based on how fast your machine is and the internet speed—during which you can sip a cup of tea or use your computer while running the installation in the background.
Once Window 11 is installed, click the Restart now button or wait for the PC to automatically restart within 30 minutes. Your computer will reboot to finalize the update process after which, you’ll be greeted with a Windows login page. Go ahead and log in to your machine for Windows to finally usher you into their new Windows 11 incredible world.

What if you’ve encountered any problems during the installation process? Or, what if you want to do a clean install on your computer without taking the time to upgrade from Windows 10 to 11? Don’t worry—we have a solution for that too.
Way Two: Clean Install Windows 11 from Bootable USB
With a bootable USB drive, you can do a fresh installation of Windows and have a backup copy of Windows 11 files nearby for updating Windows on other computers without recreating another bootable USB.
You need a USB flash drive larger than 8GB in size and access to a PC to create a bootable USB drive. Be sure to back up your data as this process wipes out everything.
To create a bootable USB with Windows 11 files, go to Microsoft Windows 11 download webpage and download the file under the Create Windows 11 Installation Media section and launch the file to start the Windows setup process. Agree to the Windows License terms and change the language if necessary.
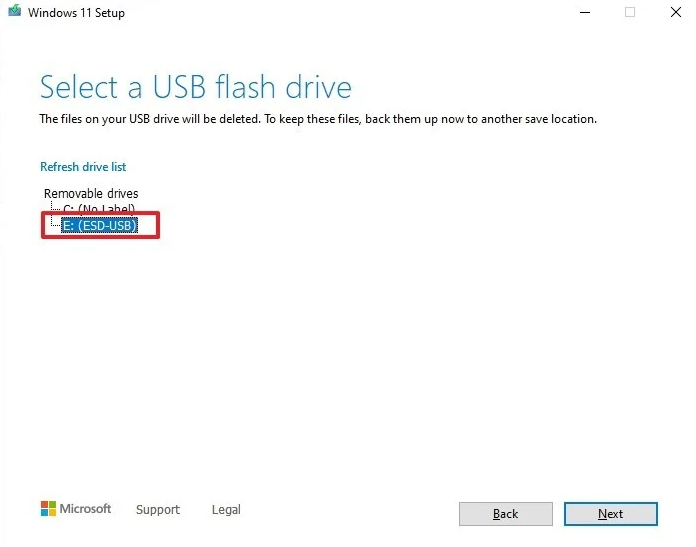
In the Choose which media to use menu, select USB flash drive. Make sure you have the USB drive connected and click on the refresh drive list to select the flash drive you want to use and click Next.
The process takes a few minutes, so you can go ahead and do something while you wait. The installer will download and create Windows 11 media, and voila, your USB drive is now ready.
How to Install Windows 11 Using Bootable USB
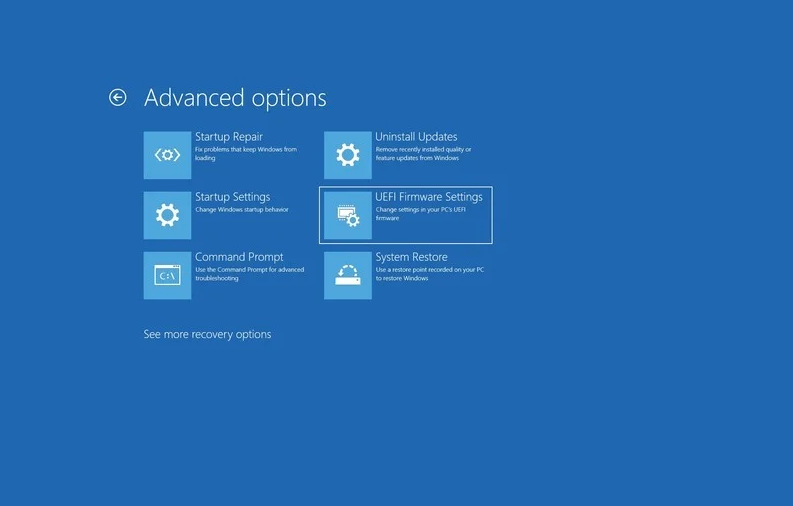
To do a clean install of Windows 11, you need to navigate into BIOS by hitting the Start button>Settings>Update and Security>Recovery>Restart Now under the Advanced startup. In the Choose Option window, click on Troubleshoot UEFI Firmware settings under Advanced Option and click restart button to load the system into BIOS.

Alternatively, you can plug the bootable USB into the USB port of your new PC and power it on. Mostly, the computer will boot straight into the Windows 11 Install window. If you have no the UEFI Firmware settings, turn off the computer, then turn it on. As the computer boots up, quickly press the boot key on your screen to enter BIOS utility.
Note: Boot keys are often written at the bottom of the screen when the machine boots up. It can be any key according to what computer you use. It can be any function key, Del button, or ESC key. In our case, it is the Del key.
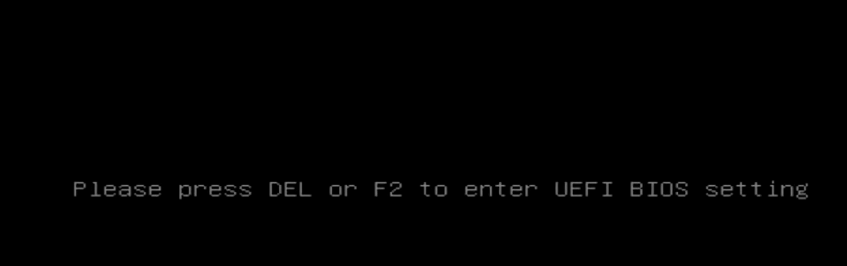
Navigate to the boot override section in the boot menu, then select and boot into the USB flash drive you made.

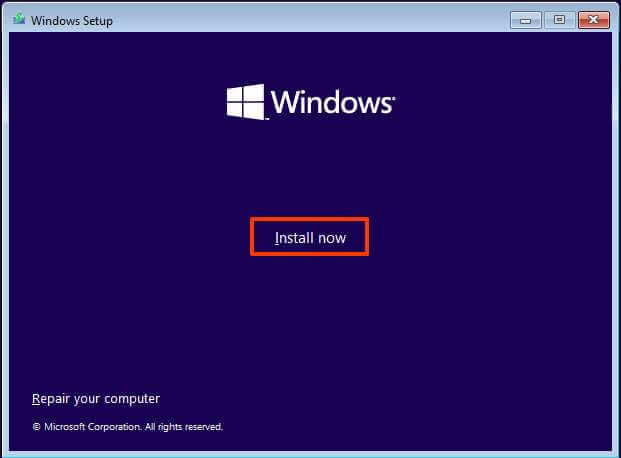
The computer will load up the Windows 11 installer. Select your default language and click next and Install Now.
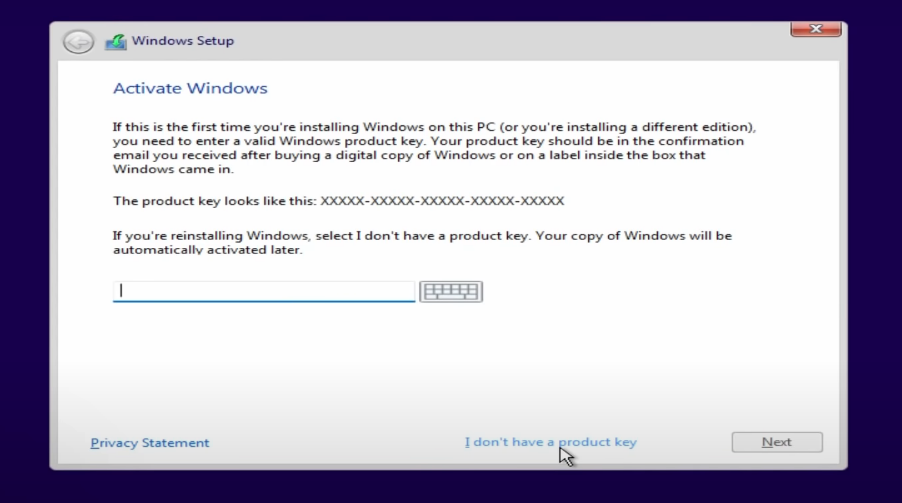
If you have a product key, type it in now, or click I don’t have a product key to activate windows 11 later.
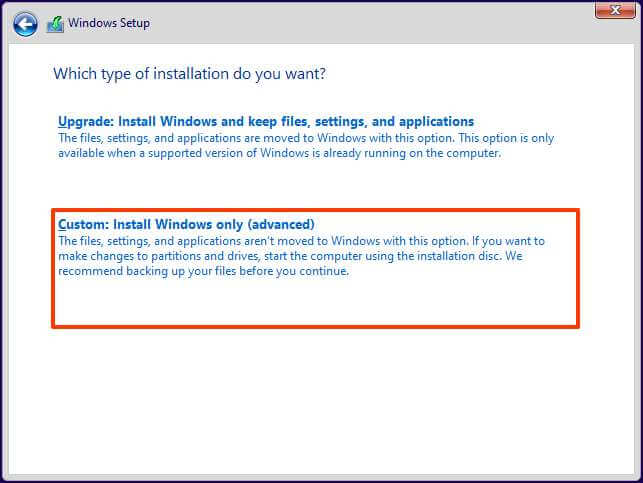
Choose the Window 11 version, preferably Windows 11 Pro, agree to the Windows License term and click next. Go with the Custom installation option in the window that appears to erase everything and do a clean install. Select the drive you want to install Windows on and click Next.
Windows setup will take over, and after that, be guided through setting up Windows 11. After a few reboots, Windows will require you to log in or add your Microsoft account. You can opt to customize your experience with Windows 11 based on your preferences. That’s it. The computer will usher you into the Windows 11 desktop.
From this guide, you have seen that you don’t need a technical expert to install Windows 11 on your device, provided it meets the requirements. Installing Windows 11 on your PC is a great wat to upgrade its display and performance. But, what if you want to get acquire a new device, capable of running Windows 11?
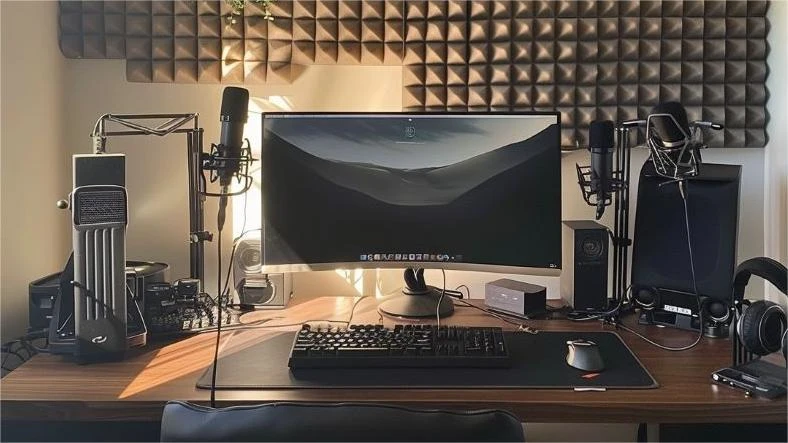
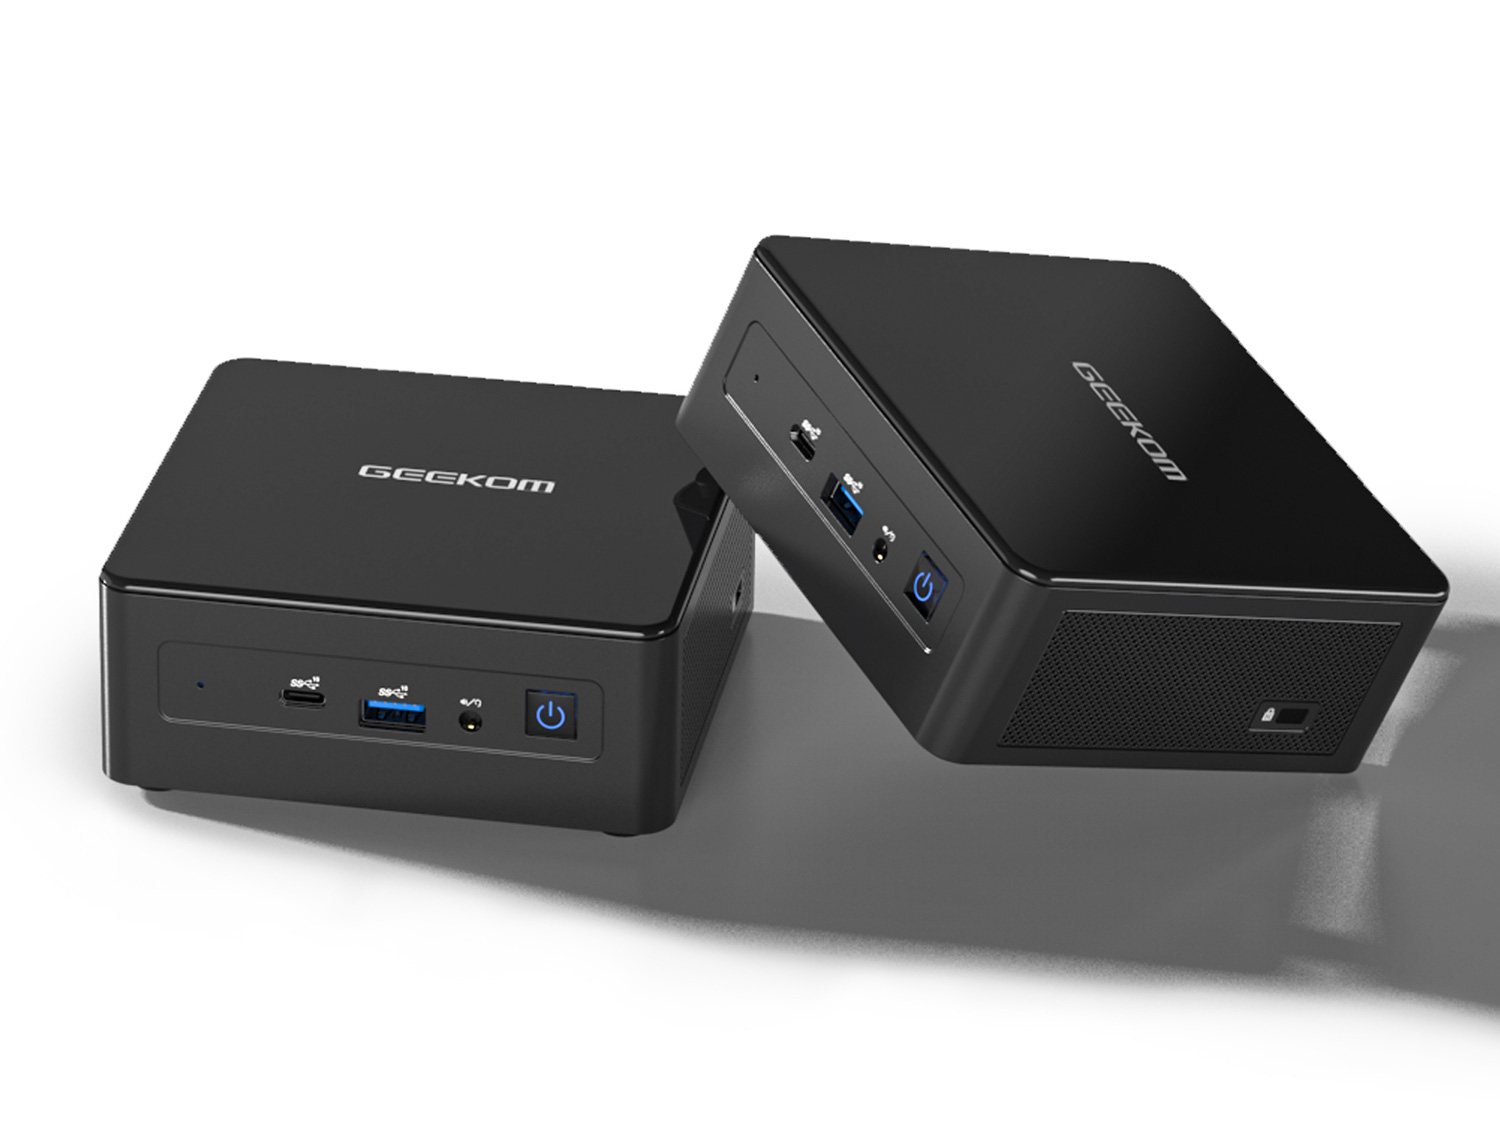
Introducing Geekom Mini IT8 PC – Intel 8th Gen Core i5, Windows 11 ready
If you’re looking for a device capable of running Windows 11 natively, look no further than Geekom Mini IT8 PC. This Mini PC comes preinstalled with Windows 11 Pro, you don’t have to do is follow the above simple steps to install Windows 11 on your computer. You can learn more about the device specs here and all that it has in store for you.
If you’re considering upgrading your computer for an optimal Windows 11 experience, look no further than GEEKOM’s collection of high-performance mini PCs.